by ClearEvent Support | Release Notes
This service release includes critical bug fixes related to registration payment processing that affected a small number of customers.
What’s New
Registration Forms
- Fixed a numeric rounding issue with fee charges that caused some customers to experience the following error message when registering: “Error processing registration: There was an error with payments. The amounts that were displayed did not match the calculated amounts. Payment rejected.”
- Enhanced the receipt sent when registrants sign up and submit a payment. A detailed breakdown of the fees is now shown that includes both the ClearEvent Platform Charge and the Stripe Service Charge.
by ClearEvent Support | Release Notes
This service release includes both bug fixes and changes to our product plan offering.
What’s New
General
Registration Forms
- An issue has been resolved that may have prevented some participants from registering for an event if they selected multiple Availability Periods from a registration form.
by ClearEvent Support | Release Notes
This service release adds file attachment capabilities to registration forms to allow participants to attach images and documents to their registration.
What’s New
Registration Forms
- Event Organizers can use ClearEvent’s new File Attachment field feature to collect files when participants register for your event. The File Attachment Form Field can be added to any new or existing registration form. Use the File Attachment field to collect files like headshot photos, signed documents, proofs of certification, insurance certificates, etc.Follow these steps to add a File Attachment Form Field to a form:
- Open the Forms module.
- Select an existing Registration Form from the list and click the Edit button or add a new form. The Form Designer will appear.
- If the form has been published, select the Publish tab and click the Un-publish Form button.
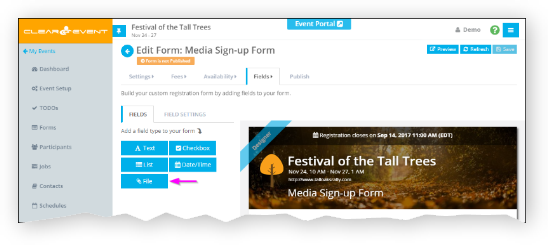
- Select the Fields tab.
- Click the File button to add a new File Attachment field to your form.
- You can add as many File Attachment fields as you like. However, be aware there is a 10MB file upload quota per form. If the combined file size of all registrant submitted attachments exceed this quota, the registrant will receive a warning message and will not be allowed to register.
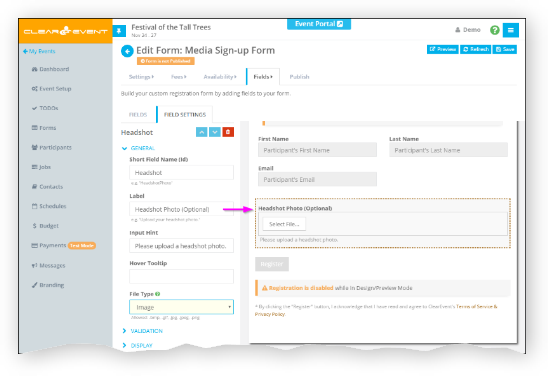
- At a minimum, enter a unique value into the Short Field Name (Id) property and choose the desired File Type. Registrants can upload an Image (.bmp, .gif, .jpg, .jpeg, .png) or Document (.csv, .doc, .docx, .pdf, .pptx, .txt, .xls, .xlsx).
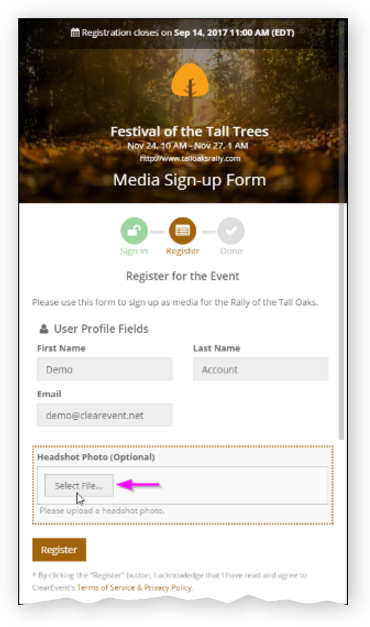
- Registrants can simply upload a file when they register by click the Upload File button.
- Event Managers can view, delete or even update the file attachment on a received registration by using the Participants module and opening the Participant Details > Registration tab:
General
by ClearEvent Support | Release Notes
This release includes numerous improvements to the Event Portal to enable event participants with physical disabilities to better access the Event Portal. Other areas improved include job assignment enhancements, changes to the test-mode indicator, cloning schedules, and application performance.
What’s New
Accessibility
- The Event Portal is now even more accessible to participants with physical disabilities. The Event Portal meets WCAG 2.0 Level AA compliance standards, an important requirement for many events.
Event Portal
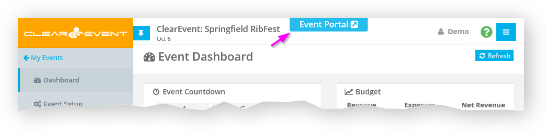
- Quick Launch: Jumping to your Event Portal is easier than ever. From the Event Manager, simply click the “Event Portal” link in the header.
Jobs
- Job Notifications: When ClearEvent detects there are changes your participants need to know about, the “Notify Participants” button will be shown in the Jobs tab. Clicking the “Notify Participants” button, will notify all participants of changes when jobs they’re assigned to are updated. Look for the “Notification Pending” badge in the list of jobs shown to see which jobs have pending notifications that have not yet been sent.
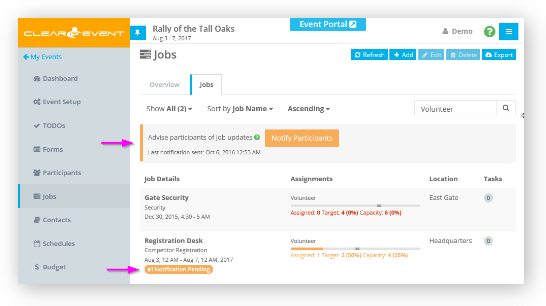
- Job Assignments: We’ve made assigning jobs to participants, like volunteers, even easier. A simple indicator helps to quickly identify participants that are available to help. Detailed participant assignment and availability information is right at your finger tips when you needed it most.
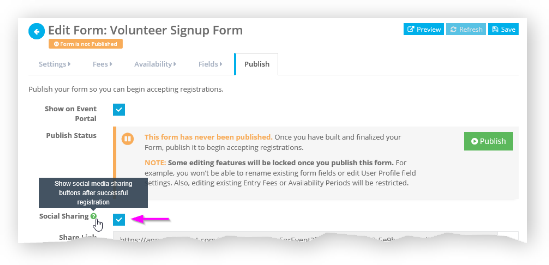
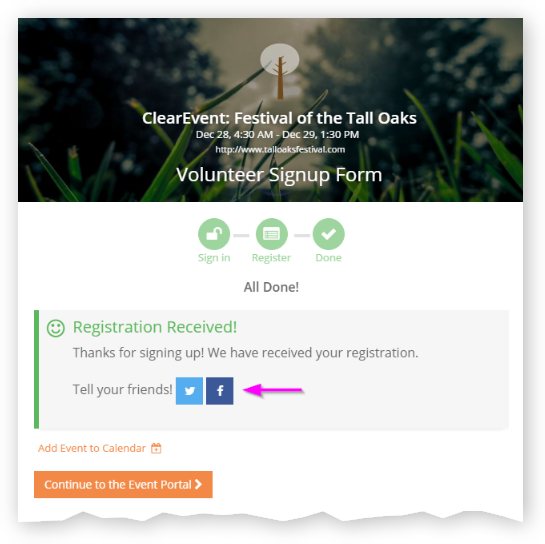
Social Sharing
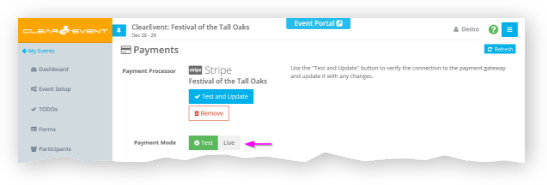
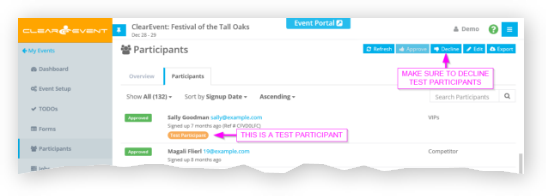
Payments
Usability
- A large number of usability improvements were made to make clearevent even easier to use.
General
- Numerous improvements to stability have been delivered in this release.
by ClearEvent Support | Release Notes
This release includes numerous improvements to job assignment features and Event Portal usability.
What’s New
Jobs
- Sorting Jobs: You can now sort jobs by % Assigned to find jobs that are under allocated or over allocated. This field shows you the percentage that your job has been filled with participants. Once sorted by % Assigned, the list of jobs will be sorted in order of participant assignment completion.

- Job Assignment Enhancements: Assigning jobs to registered participants (like Volunteers) is now easier than ever. We’ve made a number of improvements to the Job section > Job Details > Assignments tab.
- The Job start & end date is now always visible, even when the Assignments tab is selected.
- The enhanced job assignment grid heading shows details that make it easy to know if you’ve met your job assignment goals. The header now shows the number of currently assigned participants, how close you are to your target participant count (if specified), and how close you are to your job assignment capacity (if specified). Red/Yellow/Green colors indicate if you are on track. Red indicates you are either well under your target, or if you are over capacity. Yellow indicates you’re at least half the way to your target (if specified) or your capacity (if target is not specified). Finally, green indicates that you can pat yourself on the back because you’ve filled your job with participants!
- The Available Participants grid has been optimized to show more participants on screen at once. It is now always visible. This makes finding & filtering participants much faster.
- Participant Availability tooltips have been revised to show current job assignments as well as the availability periods the participant selected when they registered.
- Use the Availability Indicator in conjunction with the Participant Availability tooltip to quickly determine if a participant is available and if not, what conflicts they might have.
Event Portal
- Usability Participants that are not signed in to the Event Portal will now find it easier to view private messages that event organizers send through the Messages module. New highly-visible Sign In buttons have been added to make signing in a breeze.
Registration Forms
- Registration Forms that an Event Organizer publishes will now contain a support message that directs registrants to contact ClearEvent directly in the event of a technical difficulty. Registrant’s are of course still asked to direct any questions about the event itself to the Event Organizer.