Set Clear Goals: Define success metrics like revenue, attendance, and brand visibility.
Organize Your Budget: Focus on marketing, operations, guest experience, and an emergency fund.
Use Tools to Track Spending: Platforms like ClearEvent simplify real-time expense tracking and ROI analysis.
Analyze Past Data: Learn from previous events to improve cost efficiency and focus on high-impact areas.
Stay Flexible: Keep an emergency fund and adjust your budget as priorities shift.
Quick Tip: Use software to monitor expenses live, ensure category limits, and calculate ROI by category to see what works best.
Event Budgeting: How to Cut Costs and Maximize Profits
Step 1: Set Goals and Review Finances
Start by defining your financial goals and reviewing your budget to ensure every dollar is spent wisely. This step helps you create measurable objectives and a customized budget plan.
Define Success Metrics
Identify specific, measurable goals that align with the purpose of your event. Consider these areas:
Revenue Goals: Income from ticket sales, sponsorships, and other sources.
Attendance Numbers: Target audience size and key demographics.
Brand Visibility: Metrics like social media reach, press mentions, and new leads.
Tools like ClearEvent can help you monitor these metrics in real time, making it easier to refine your strategy as needed.
Analyze Past Events
Look at data from previous events to understand spending patterns and identify areas for improvement. Focus on key metrics such as:
Cost per Attendee: Divide total expenses by the number of attendees.
Top Revenue Sources: Pinpoint which income streams performed best.
High-Impact Expenses: Find out which investments delivered the best returns.
Build from Scratch
Use a zero-based budgeting approach. Instead of relying on past budgets, justify each expense individually to ensure it aligns with your goals.
Step 2: Divide Budget by Event Components
Break down your budget across key areas to ensure smooth operations, happy attendees, and a better return on investment.
Marketing Budget
Set aside a good portion of your budget for marketing to boost ticket sales and make your event stand out:
Digital ads aimed at your target audience
Email campaigns to keep attendees informed
Promotional content that grabs attention
Press releases and influencer outreach to expand visibility
ClearEvent makes it easy to monitor marketing expenses in real time.
Operations Budget
Operations often take up a large chunk of the budget, covering essential logistics and infrastructure:
Category
Components
Venue
Rental fees, insurance, and necessary permits
Technology
Event software, AV equipment, and reliable WiFi
Staff
Coordinators, security personnel, and tech support
Logistics
Transportation, storage, and setup/takedown services
“I’m finding it very intuitive to set up my event, and there are many, many built-in features that will help me manage my event successfully.”
– Celena S., Event Founder [1]
Pair operational efficiency with a top-notch guest experience for the best results.
Guest Experience Budget
Investing in the attendee experience is key to your event’s success and encourages repeat visitors. Focus on:
Check-in and registration: Use digital tools to make arrivals seamless
Catering: Provide quality food and drinks
Engagement tools: Mobile apps, live polls, networking platforms, and digital schedules
Materials and gifts: Event swag, session resources, and follow-up content
“The app guides you through everything needed to plan your event. A real game-changer!”
– Shannon M., Treasurer (Arkansas Chapter of APCO) [1]
Step 3: Use Software to Track Spending
Using digital tools is crucial for keeping track of expenses accurately and making smart ROI decisions. These tools are the foundation of effective financial management during your event.
Once your budgets are set, tools like ClearEvent can help you stay on top of your finances.
Digital Expense Management
ClearEvent’s dashboard makes it easy to manage expenses with built-in budget categories. Here’s what you can do with it:
Track registration income alongside expenses
Organize your finances with pre-loaded budget categories for better clarity
Live Budget Updates
ClearEvent provides instant insights into your revenue, expenses, and overall cash flow. This allows you to quickly adjust if your budget starts to shift off course.
With real-time tracking, advanced analytics help link your spending to actual results.
You can monitor revenue streams as they come in, compare them with your projections, and create detailed financial reports. This helps pinpoint areas where you can improve efficiency and maximize outcomes.
Step 4: Build in Budget Flexibility
Having flexibility in your budget helps you stay on track with ROI, even when unexpected costs pop up or priorities shift during planning.
Emergency Fund Setup
Create an emergency fund to cover unforeseen expenses. Divide this reserve across key budget areas like core operations, marketing, guest experience, and technology, based on your event’s needs. This gives you the ability to reallocate funds easily if costs change.
Budget Adjustment Process
Use real-time tracking to make informed budget adjustments. Here’s how to manage this effectively:
Identify Cost Hotspots
Regularly check your dashboard to find areas where spending is higher or lower than expected.
Evaluate ROI Impact
Before moving funds between categories, think about how the changes will affect your ROI. Look at immediate cost savings and how it could influence potential revenue.
Document Changes
Keep a record of every adjustment, including details and how it impacts ROI. This not only provides an audit trail but also helps improve planning for future events.
Step 5: Measure Final Results
Compare Results by Category
Breaking down ROI by budget category helps identify which investments performed best. Start by comparing actual spending to the outcomes in each category using analytics tools from your event management platform. For instance, if you spent $15,000 on marketing, evaluate how much ticket sales and registrations those campaigns generated.
Create a performance scorecard for each budget category:
Category
Metrics to Track
ROI Indicators
Marketing
Cost per registration, email open rates, social engagement
Ticket sales, lead generation
Operations
Setup costs, staff hours, equipment expenses
Cost savings, time efficiency
Guest Experience
Cost per attendee, satisfaction scores, app usage
Retention rates, NPS scores
Use a weighted approach when evaluating ROI. For example, you might assign 50% to direct revenue, 30% to lead generation, and 20% to long-term metrics like NPS scores.
Once you’ve analyzed each category, assess the overall impact of your event by considering both short-term and long-term returns.
Calculate Total Impact
To understand the full effect of your event, measure immediate outcomes alongside long-term benefits:
Immediate Returns:
Revenue from ticket sales and sponsorships
On-site purchases and upgrades
Cost of lead generation versus qualified prospects
Long-term Value:
Revenue from partnerships formed after the event
Improvements in customer retention rates
Growth in brand awareness
A complete ROI calculation should include both measurable and less tangible benefits. For example, a 2024 corporate summit reallocated 35% of its operations budget, saving $12,000 while boosting engagement by 22% [2].
Keep track of all metrics systematically to capture both immediate results and long-term effects. Present your findings with data-backed insights. For example, Water.org’s 2024 gala analysis revealed that allocating 20% of the total budget to guest experience led to 68% of donor commitments [3].
Finally, use reporting tools to align expenses with registration data, ensuring accurate cost-per-attendee calculations.
Conclusion: Budget Planning Checklist
Turn your event budget planning into an organized process that ensures you get the most out of your investment. Use this checklist to streamline your strategy and stay on track.
Pre-Event Financial Planning
Set clear goals for the event and each budget category.
Review past data to set realistic expectations.
Develop budgets for each category with room for adjustments.
Use digital tools to track expenses in real time.
Budget Category Breakdown
Category
Key Metrics
Marketing
Cost per registration, conversion rates
Operations
Cost savings, efficiency
Guest Experience
Satisfaction scores, retention
Emergency Fund
Funds reserved for unexpected costs
Tools for Budget Management
Use event management software to track budgets.
Set up automated alerts for spending limits.
Ensure all team members follow expense tracking protocols.
Prepare ROI tracking tools before the event starts.
“Track event financials with ease. Use a starter budget loaded with common revenue & expense categories, or import your own event budget.” – ClearEvent [1]
Financial Oversight
Implement approval processes for all expenses.
Have backup plans for budget changes.
Keep detailed records of spending decisions.
Monitor how expenses affect the budget during the event.
Follow these steps to keep your event finances under control and achieve the best results.
FAQs
How can I measure the ROI of different event budget categories effectively?
Measuring the ROI of your event budget categories starts with identifying your event goals and assigning measurable metrics to each category. For example, if you’re focusing on marketing, track metrics like ticket sales or website traffic generated from ads. For attendee experience, you might measure satisfaction through post-event surveys.
To calculate ROI, compare the revenue or value generated by each category against the amount spent. For instance, if you spent $5,000 on marketing and it led to $20,000 in ticket sales, your ROI for that category would be 300%. Use tools like ClearEvent to monitor budgets and track performance in real time, making it easier to adjust spending for maximum impact.
How can I adjust my event budget to handle unexpected costs or shifting priorities?
Unexpected costs or changing priorities are common challenges in event planning, but with a flexible approach, you can adapt effectively. Start by identifying areas in your budget that are less critical or have room for adjustment, such as non-essential decor or optional add-ons. Redirecting funds from these areas can help cover urgent expenses.
It’s also helpful to maintain a contingency fund – typically 10-15% of your total budget – to address unforeseen costs. If you don’t have one in place, consider reallocating funds from lower-priority items. Additionally, communicate with your vendors and partners to explore cost-saving options, such as renegotiating contracts or adjusting service levels.
Using a tool like ClearEvent can make this process smoother by providing real-time budget tracking and clear visibility into all expense categories, helping you make informed decisions quickly.
How can I use data from past events to optimize future budgets and boost ROI?
Leveraging data from past events is a powerful way to make smarter budget decisions and improve ROI. Start by analyzing key metrics such as attendance numbers, ticket sales, marketing campaign performance, and actual vs. planned expenses. Identify areas where spending delivered the most value, like high-performing marketing channels or popular attendee experiences.
Use this data to adjust your budget allocation for future events. For example, if social media ads drove most registrations, consider increasing that budget. Similarly, if certain expenses didn’t yield significant results, reallocate those funds to higher-impact areas. With tools like ClearEvent, you can track and manage your event budgets more effectively, ensuring every dollar is spent strategically.
Choosing the right system for your event is crucial. Registration systems focus on collecting detailed attendee information, making them ideal for conferences or workshops. Ticketing systems are designed for fast transactions and simple access control, perfect for concerts or sports events.
Quick Overview:
Registration Systems: Collect detailed attendee data, manage different participant types, and support ongoing communication.
Ticketing Systems: Handle fast ticket sales, multiple pricing options, and efficient event access.
Feature
Registration Systems
Ticketing Systems
Focus
Attendee data & engagement
Transactions & access control
Best For
Conferences, workshops
Concerts, entertainment events
Key Features
Custom forms, detailed profiles
Quick sales, access validation
Bottom Line: Choose based on your event’s needs – registration for complex events, ticketing for straightforward ones.
How to improve your event registration system
Event Registration vs Ticketing: Basic Concepts
Let’s break down the core functions of registration and ticketing systems to better understand their roles in managing events.
Event Registration Systems Explained
Registration systems focus on collecting and managing detailed attendee information. These systems are designed to gather specifics such as:
Professional backgrounds
Dietary needs
Session preferences
Accommodation requirements
The goal here is to create in-depth attendee profiles rather than just processing transactions. Registration platforms allow for customized forms, support various attendee categories, and streamline communication throughout the entire event.
Ticketing Systems Explained
Ticketing systems are all about quick and efficient transactions. They’re built to handle:
Ticket sales processing
Multiple ticket types and pricing options
Delivery of digital or printable tickets
Event access control
These systems are perfect for managing large-scale ticket sales where detailed attendee data isn’t essential – think concerts, sports games, or entertainment events.
Main Differences Between Systems
The key difference lies in their primary focus: registration systems emphasize attendee data and engagement, while ticketing systems prioritize transactions and access management.
Aspect
Registration Systems
Ticketing Systems
Primary Focus
Collecting attendee data
Processing transactions
Data Collection
Detailed profiles
Basic contact info
Communication
Ongoing engagement
Purchase confirmations
Best For
Conferences, workshops
Concerts, shows
Group Handling
Individual profiles
Bulk ticket sales
Registration systems are ideal for events like conferences or workshops, where you need:
Different registration types
Complex agendas
Continuous attendee communication
Ticketing systems, on the other hand, shine in scenarios where:
Speedy transactions are key
Minimal attendee information is required
Simple access control does the job
Understanding these differences helps clarify which system suits specific event needs. Next, we’ll dive deeper into the core features of each.
Core Features Comparison
Compare the main functions of registration and ticketing systems to determine which aligns best with your event’s requirements.
Registration System Features
Registration systems are designed to manage attendees thoroughly with features like:
Advanced Data Collection: Customizable forms to gather detailed attendee information.
Multi-Tier Registration: Handles different registrant types with tailored forms and pricing options.
Reporting Tools: Analytics for monitoring attendance, preferences, and participation trends.
Communication Suite: Tools for personalized emails, updates, and attendee engagement.
Approval Processes: Workflows for reviewing and approving registrations.
These systems focus on managing attendees and their experiences from start to finish.
Key Ticketing Capabilities
Ticketing systems, on the other hand, are built for speed and efficiency:
Quick Transactions: Seamless processing for individual and group ticket purchases.
Pricing Management: Offers multiple ticket types, early bird discounts, and promo codes.
High-Volume Sales: Handles large-scale transactions with ease.
Access Control: Digital ticket validation and streamlined check-in processes.
These systems emphasize fast sales and smooth entry management.
Feature Comparison Chart
Here’s a side-by-side look at how the two systems differ:
Feature Category
Registration Systems
Ticketing Systems
Data Collection
Detailed attendee profiles
Basic contact details
Payment Processing
Registration fee management
High-volume ticket sales
Group Management
Requires individual profiles
Supports bulk ticket purchases
Communication
Tools for personalized engagement
Transaction confirmations
Reporting
Detailed attendee analytics
Sales and attendance tracking
Access Control
Tracks attendance
Quick entry validation
While registration systems focus on detailed attendee management and engagement, ticketing systems excel in fast sales and efficient access control.
Pros and Cons Analysis
Here’s a breakdown of the main advantages and limitations of registration and ticketing systems, based on their features.
Benefits of Registration Systems
Registration systems are designed to handle attendee management tasks effectively. Their strengths include:
Personalized communication that helps boost attendee engagement
Automation that minimizes manual errors and ensures better data accuracy
The ability to scale effortlessly for events of any size
Customized content delivery tailored to individual attendee preferences
These systems are particularly well-suited for events requiring detailed attendee data and tailored experiences.
Benefits of Ticketing Systems
Ticketing systems focus on simplifying event access and transactions. Key benefits include:
Streamlined purchase processes, including options for group bookings.
Fast transactions and confirmations, making the buying experience smoother.
These systems are ideal for straightforward events where speed and simplicity are priorities.
Limitations of Each System
Both systems come with certain constraints that may influence your choice.
Registration System Limitations:
Setting up for basic ticketing needs can be unnecessarily complex.
Filling out detailed forms can take more time for attendees.
Advanced features may have a steeper learning curve for users.
Ticketing System Limitations:
Limited ability to collect detailed attendee information.
Refund processing can be challenging
Service fees can increase the final ticket price
Risks of ticket fraud may pose security concerns
When deciding which system to use, think about your event’s specific needs. For example, ticketing systems work well for simple events like concerts, while registration systems are better suited for professional conferences that require more detailed attendee data and customization.
How to Choose the Right System
Let’s break down the critical factors to guide your decision.
Event Purpose and Goals
Your event’s purpose shapes the system you need.
For straightforward events like concerts, festivals, or single workshops, a ticketing system may do the job. These events usually need basic attendee details and simple access management.
On the other hand, more complex events – such as multi-day conferences, corporate meetings, or professional training sessions – require a system with advanced registration features. These systems can handle detailed attendee data, session assignments, and offer personalized experiences.
Now, think about how the size of your event and your budget will affect your choice.
Event Size and Cost
The size of your event plays a big role in determining the right system:
Event Scale
Attendees
Suggested System
Small
Under 100
Either system works – focus on simplicity
Medium
100–500
Registration system for better management
Large
500+
Both registration and ticketing features needed
Budget also matters. While a basic ticketing system might seem cheaper upfront, a more advanced registration system can offer better long-term value with its attendee management tools.
Finally, think about how much interaction you want with your attendees when choosing your system.
Attendee Interaction Needs
How you plan to engage with attendees is another key factor. Here’s what to consider:
Basic Interaction Needs:
Simple check-in
Standard confirmation emails
Basic attendee information collection
More Advanced Engagement:
Detailed participant profiles
Options for session selection and scheduling
Tailored communication workflows
Real-time engagement tools like live polling or Q&A
ClearEvent: Registration and Ticketing in One Platform
ClearEvent combines advanced registration tools with easy-to-use ticketing features, all in a single platform. This setup caters to the diverse needs of modern events.
Attendee Management Tools
ClearEvent simplifies attendee management with custom forms tailored for delegates, VIPs, exhibitors, and sponsors [4]. It also includes branded invitation emails and mobile check-in features, making the registration process smooth and efficient.
Ticket Sales and Payments
With Stripe integration, ClearEvent provides a secure and hassle-free ticketing experience. Here’s what it offers:
Feature
What It Does
Quick Payouts
Receive funds in just a few days
Flexible Pricing Options
Includes early-bird rates, promo codes, and group discounts
Secure Transactions
Payments are processed with PCI compliance
Global Reach
Accepts payments from around the world
“With ClearEvent and Stripe, you can accept online payments seamlessly, streamline event payment processing, and focus on creating memorable experiences for your attendees.” – ClearEvent [5]
The pricing structure is straightforward, covering standard payment processing and service charges, with no extra fees for free registrations [5].
Complete Event Platform
ClearEvent goes beyond ticketing and registration by offering a full suite of event management tools:
Additionally, the mobile scanning app allows for contactless check-ins, making entry quicker and easier for both staff and attendees [4].
Conclusion
Selecting between event registration and ticketing systems doesn’t have to be an either-or decision. Today’s events call for tools that can handle detailed attendee information while ensuring secure payment processing.
The ideal solution combines strong registration features with dependable ticketing options, ensuring you don’t need to sacrifice one for the other. ClearEvent offers exactly that – a complete event management platform designed to simplify the entire process. According to its documentation:
“Whether you’re new to events or a seasoned event pro, ClearEvent gives you the tools to not only register your attendees, but also plan, manage, budget, communicate, and more!” [4]
When evaluating platforms, look for these essential features:
Customizable registration forms to manage attendee data effectively
Secure payment options that cater to different pricing models
Built-in communication tools to keep attendees informed and engaged
Advanced reporting tools to support informed decision-making
Planning a large-scale event? Team collaboration is the key to success. Here are 8 practical tips to streamline communication, assign clear roles, and manage tasks effectively – ensuring your event runs smoothly and on time:
Set Clear Team Roles: Assign responsibilities based on skills and experience to reduce confusion and improve accountability. Use tools like skills matrices to match tasks to team strengths.
Centralize Communication: Avoid missed updates by keeping all communication in one platform. Use dashboards for real-time tracking of tasks, schedules, and resources.
Use the Right Tools: Pick event management software with task tracking, built-in messaging, mobile access, and budget monitoring.
Build Strong Relationships: Foster open communication through daily stand-ups, cross-team meetings, and feedback sessions. Plan team-building activities to strengthen bonds.
Create a Detailed Schedule: Break planning into phases with clear deadlines. Use tools to monitor progress and adjust timelines as needed.
Share Live Updates: Use mobile notifications and real-time updates to keep your team informed during the event.
Learn from Feedback: Gather team input post-event to identify what worked and what needs improvement. Turn feedback into actionable changes.
Ensure Accessibility: Plan accommodations for diverse needs, like visual, hearing, and mobility support, so every team member can contribute effectively.
Quick Overview of Tools: Platforms like ClearEvent simplify collaboration with features like task management, automated reminders, and accessibility options.
Event Producer Tips: 4 Tips to Manage Your Team at Your …
1. Set Clear Team Roles
Laying out clear roles is crucial for smooth event management. When everyone knows their responsibilities, it reduces confusion and ensures accountability. Studies show that unclear roles often lead to duplicate efforts and delays.
Match Tasks to Skills
Use a skills matrix to assign tasks effectively:
Role
Primary Responsibilities
Required Skills
Event Manager
Overall coordination, budget management
Leadership, strategic planning
Creative Director
Ensuring brand alignment, visual design
Design, creative direction
Logistics Head
Venue setup, vendor coordination
Organization, problem-solving
Technical Director
Managing AV equipment, digital systems
Technical know-how, troubleshooting
Registration Coordinator
Handling attendee check-in, badge distribution
Customer service, attention to detail
“Everyone has different strengths and abilities so working as a team will ensure that productivity is maximized. Allocate roles to those that suit them.”
When assigning roles, take these into account:
Experience: Assign tasks based on what team members have done before.
Strengths: Match responsibilities to natural talents.
Growth Opportunities: Let team members take on tasks that help them grow, as long as it doesn’t slow things down.
Once roles are in place, keeping track of progress is the next step.
ClearEvent’s task management tools make staying on top of responsibilities easier with:
Real-time updates on progress
Automated reminders
Visibility across teams
Deadline tracking
Resource management features
The platform’s centralized dashboard and regular check-ins help teams stay accountable and quickly address any issues. With ClearEvent, you can monitor progress without hovering over your team.
2. Keep Communication in One Place
Once roles are clearly defined, the next step is simplifying how your team communicates. Clear and organized communication is essential for pulling off a large-scale event. Using too many channels can lead to confusion and missed details. By centralizing all event-related communication, you can keep everyone on the same page and avoid unnecessary chaos.
Monitor Event Dashboards
Think of your event dashboard as the command center. It provides real-time updates, ensuring you stay on top of every detail. Here are some key elements to keep an eye on:
Dashboard Component
Purpose
Update Frequency
Task Progress
Track what’s been completed
Real-time
Team Messages
Share updates and address concerns
Instant
Timeline Changes
Stay aware of schedule adjustments
As needed
Resource Allocation
Manage equipment and staff usage
Daily
Stakeholder Updates
Keep sponsors and vendors informed
Weekly
ClearEvent’s dashboard, for example, offers visibility into everything from task progress to vendor coordination and attendee management. This kind of centralized monitoring is key to staying organized.
Plan Regular Team Updates
In addition to monitoring dashboards, regular team check-ins help keep everyone aligned. Schedule daily updates for quick progress reviews and weekly meetings for strategic discussions. Use a shared master calendar to track deadlines and milestones, and document major decisions and action items in your central platform.
For instance, the Northwest Event Show successfully used automated communications and personalized stakeholder portals to keep everyone informed and engaged [3].
Tools like ClearEvent make this process easier by offering automated notifications, customizable templates, role-based access, and built-in messaging features.
Streamlined communication sets the stage for selecting the right tools to manage your event effectively.
3. Choose the Right Management Tools
Picking the right management tools is essential when organizing large events with teams spread across different locations.
Key Features to Look For
When selecting an event management platform, focus on features that improve team coordination and simplify operations:
Feature Category
Key Components
Why It’s Important
Team Coordination
Task tracking, job assignments, role-based access
Clarifies responsibilities and ensures accountability
Communication
Built-in messaging, automated notifications
Keeps teams updated without relying on endless emails
Budget Tracking: Provides real-time updates on planned versus actual expenses, helping you make informed financial decisions.
Task Management Tools: Lets you create, assign, and track tasks to ensure nothing is overlooked.
Rollover Protection: Automatically resets tasks, jobs, and budgets for recurring events, so outdated information doesn’t carry over.
“I’m finding it very intuitive to set up my event and there are many, many built-in features that will help me manage my event successfully.” – Celena S., Event Founder [5]
“Without a doubt, the best event-planning software out there. Absolutely no cons!” – Teri F., Assistant Chair of Prescott Frontier Days – World’s Oldest Rodeo [5]
4. Build Strong Team Relationships
Strong teamwork helps groups tackle challenges more effectively. Here’s how to create those connections.
Create Open Communication
“Event planners should involve the programming, marketing, sales, and tech teams throughout the planning process. Foster an environment where anyone can talk about their challenges or opportunities.” – Bill Zimmer, vice president of strategy for 360 Live Media [2]
Assigning an “Event CEO” ensures all departments can freely share ideas and address problems – a method that has worked well for technical institutes managing large events [2].
Communication Strategy
Purpose
Impact
Daily Stand-ups
Quick updates and issue identification
Keeps everyone aligned and informed
Cross-team Meetings
Share progress between departments
Breaks down silos
Feedback Sessions
Gather input from all team members
Encourages participation and improvement
Digital Updates
Real-time information sharing
Ensures consistent messaging
In addition to open communication, shared activities can help strengthen team connections.
Plan Team Activities
Studies show that close workplace friendships can boost satisfaction by and increase engagement. Team activities work alongside clear communication to build trust and camaraderie:
Problem-Solving Activities
The Marshmallow Challenge: Teams build towers using spaghetti, tape, and string.
Escape the Conference Room: Groups solve themed puzzles together.
Creative Collaboration
Work on a mural with an artist while sharing stories.
Try a songwriting challenge by creating new lyrics for familiar tunes.
Virtual Team Building
Wine tasting sessions led by a sommelier.
Online mixology classes.
Virtual recipe swaps to share cultural traditions through cooking.
sbb-itb-fd7582d
5. Make a Detailed Event Schedule
Clear communication and well-defined roles are key for effective teamwork, and a detailed event schedule brings everything together. It ensures everyone knows their responsibilities and timelines, keeping the entire team in sync.
Plan Key Deadlines
Break the planning process into phases with specific deadlines:
Planning Phase
Timeline
Key Activities
Initial Planning
6-12 months before
Research the market, set a budget, pick a venue
Core Development
3-6 months before
Assign teams, sign vendor contracts, assess risks
Final Preparation
1-3 months before
Train teams, finalize plans, create backups
Event Execution
Event week
Hold daily briefings, provide live updates, resolve issues
When setting deadlines, focus on these areas:
Risk Assessment: Develop a thorough plan with backup options to handle potential issues.
Team Check-ins: Schedule regular meetings to review progress, with daily stand-ups during the event week.
Vendor Coordination: Set clear delivery schedules and hold regular check-ins with suppliers.
By sticking to these deadlines and monitoring progress, you can keep everything on track.
Monitor Progress in ClearEvent
Once deadlines are in place, tracking progress becomes critical. ClearEvent offers tools to help you stay on top of everything with its dynamic dashboard.
Dashboard Overview
Track task completion in real-time.
Monitor milestones and team availability.
Keep an eye on resource allocation.
Schedule Management
Adjust timelines easily with built-in tools.
Get automated reminders for deadlines.
Track task dependencies to avoid bottlenecks.
To stay organized, update daily task progress, review milestones weekly, check resource allocation regularly, and flag potential delays immediately. This proactive approach ensures a smooth event execution.
6. Share Live Event Updates
Real-time communication is key to running large-scale events smoothly. When handling a large crowd, your team needs instant updates to adapt to changes and keep everything on track.
Use Mobile Updates
Mobile updates are a game-changer for staying responsive during events. The ClearEvent mobile app simplifies team communication with several helpful features:
Feature
Purpose
Benefit
Push Notifications
Alerts for urgent updates
Keeps the team informed instantly
Task Updates
Tracks status in real-time
Improves task coordination
Schedule Alerts
Sends time-sensitive reminders
Helps stick to schedules
Resource Tracking
Monitors inventory and staff
Optimizes resource use
To make the most of mobile communication, establish clear guidelines:
Set priority levels for updates.
Define expected response times.
Assign backup contacts for critical roles.
Use standardized formats for updates.
These tools and practices ensure your team stays connected and informed throughout the event.
Keep Teams Connected
Clear communication is critical for addressing changes or emergencies quickly. Captain Rick Francis from the Seminole County Sheriff’s Office highlights this importance:
Create Communication Channels
Assign specific channels for different areas or teams.
Set up direct lines to security and emergency services.
Plan for backup communication methods if primary systems fail.
Monitor Team Activity
Track staff locations and assignments.
Update task progress in real-time.
Share resource availability as it changes.
These strategies integrate seamlessly with ClearEvent’s centralized dashboard, which keeps everyone on the same page. The dashboard not only tracks activities but also sends automatic updates to the right people, reducing unnecessary back-and-forth communication.
7. Learn from Team Feedback
Once you’ve streamlined communication and task management, integrating team feedback becomes a powerful way to refine your event strategies.
Team feedback highlights what worked well and what needs improvement, helping you continuously enhance your approach.
Collect Team Input
Gathering feedback effectively requires the right timing and methods. Here’s a quick guide:
Feedback Type
Timing
Purpose
Quick Surveys
During Event
Address immediate concerns
Detailed Forms
Within 24 Hours
Gain deeper insights
Team Debriefs
1-2 Days Post-Event
Discuss challenges and solutions
Individual Check-ins
Within 7 Days
Handle personal concerns
To ensure honest and actionable feedback:
Schedule short, focused sessions before the team disperses.
Use a mix of tools, like digital surveys and in-person discussions.
Make feedback tools mobile-friendly for convenience.
“A debrief meeting is a good way to reflect on an event as a whole, including acknowledging successes and failures. It helps ensure that teams learn from mistakes and improve processes”.
Once you’ve collected feedback, the next step is turning those insights into meaningful changes.
Use Feedback Results
Follow these steps to transform feedback into improvements:
Organize Feedback by Category
Group responses into themes like operational challenges, communication issues, resource allocation, team coordination, and technology performance.
Prioritize Implementation
Address recurring issues first, implement easy fixes quickly, and plan for long-term changes.
Document and Share Results
Summarize feedback, highlight changes made, track improvements, and celebrate team achievements.
Platforms like ClearEvent simplify this process by offering tools to:
Collect feedback in real-time
Organize response data
Track progress on changes
Measure outcomes effectively
These steps ensure that every piece of feedback contributes to better events in the future.
8. Make Events Accessible to All
Address Team Needs
Creating an inclusive environment means addressing a variety of requirements. Here’s a quick guide:
Need Category
Accommodations
Tips
Visual
Screen readers, high-contrast displays
Use sans serif fonts, minimum 16pt size
Hearing
ASL interpreters, captions
Ensure speakers use microphones
Mobility
Accessible pathways, workstations
Allow extra time between sessions
Communication
Multiple format options
Provide written and verbal instructions
When working with large teams, consider these steps:
Train leaders to identify when extra time or assistance may be needed.
Collect accessibility requirements during registration to plan accommodations.
Use clear communication methods that work for everyone, including those relying on assistive technologies.
Leverage ClearEvent Accessibility Tools
ClearEvent provides built-in features to support accessibility and improve team collaboration:
A Mobile Event App designed to meet WCAG 2.0 standards.
High-contrast display settings for better visibility.
Screen reader compatibility for digital content.
Flexible communication tools offering various formats.
Here’s how to get started:
Set Up Communication Channels
Offer options like text and voice, and customize notification settings to suit different needs.
Adjust Visual Settings
Enable high-contrast color schemes.
Activate large text options.
Use clear visual hierarchies for easier navigation.
Provide Accessibility Features
Offer closed captions for video content.
Ensure screen readers work with all documentation.
Allow team members to request additional support.
Additionally, share materials in multiple formats to ensure everyone stays informed:
Strong team collaboration is key to pulling off successful large-scale events. Interestingly, only 7% of U.S. workers strongly agree that workplace communication is accurate, timely, and open [2]. Use this insight to improve your event planning process with the following steps.
Here’s how you can put these strategies into action right away:
1. Set Up a Central Communication Hub
Use ClearEvent to create a central platform for sharing information. Organize dedicated channels for logistics, sponsorships, and team coordination to keep everyone on the same page.
2. Clarify Team Roles
Assign leadership roles to manage cross-department collaboration. This ensures all teams know their responsibilities and can work together efficiently.
Practical Action Plan:
Timeline
Action Items
Expected Outcomes
Week 1
Configure ClearEvent dashboard and grant team access
Centralized communication hub
Week 2
Assign roles and set task permissions
Clear accountability
Week 3
Schedule regular team check-ins
Consistent updates on progress
Week 4
Launch a feedback system
Ongoing improvements
“The app guides you through everything needed to plan your event. A real game-changer!” – Shannon M., Arkansas Chapter of APCO Treasurer [5]
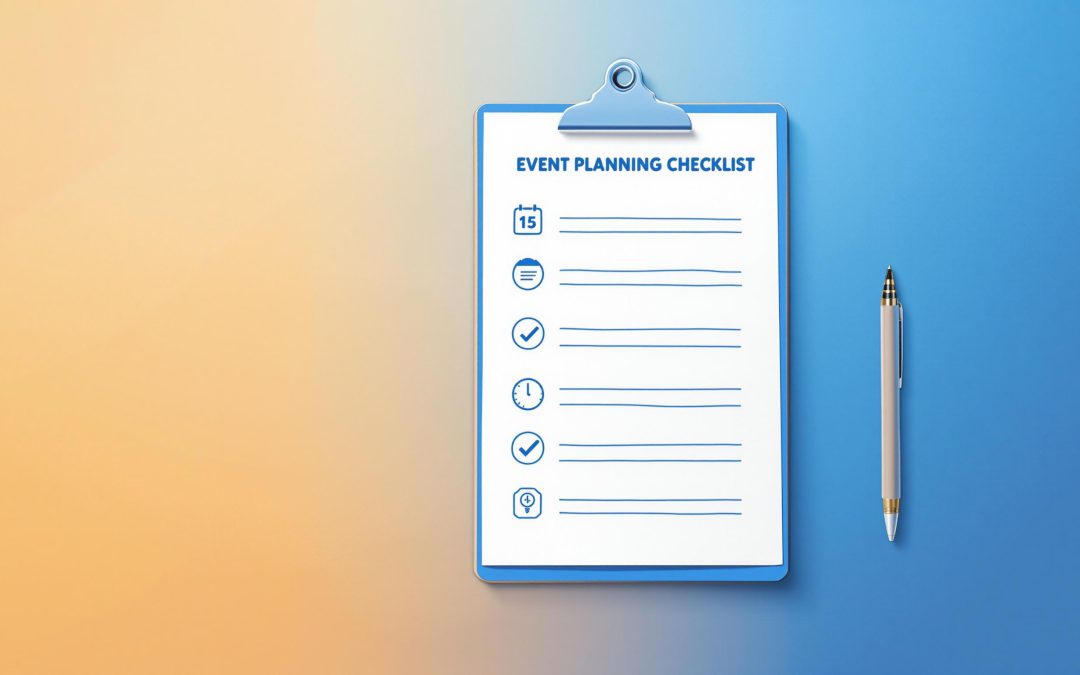
Event Planning Checklist: 15 Must-Do Tasks Before Launch
Planning an event can feel overwhelming, but breaking it into 15 key tasks makes it manageable. Whether you’re organizing a conference, workshop, or celebration, here’s a quick guide to ensure success:
Set Goals: Define event objectives and measure success (e.g., attendance, revenue).
Know Your Audience: Identify your target attendees and tailor the event to their needs.
Pick the Event Type: Choose in-person, virtual, or hybrid based on goals and budget.
Plan the Budget: List all costs, track spending, and set aside emergency funds.
Book the Venue: Reserve early, evaluate space, and test equipment.
Coordinate Vendors: Secure services, review contracts, and maintain communication.
Create a Marketing Plan: Start early with emails, social media, and promotions.
Build a Schedule: Plan every detail, from setup to breakdown, with buffer times.
Lock in Presenters: Confirm speakers, test equipment, and rehearse sessions.
Test Equipment: Check audio, visual, and internet systems before the event.
Prepare for Event Day: Rehearse, set up a control room, and monitor progress.
Engage Attendees: Use tools for smooth check-ins and real-time updates.
Collect Feedback: Send surveys post-event for insights on what worked.
Review Data: Analyze attendance, engagement, and ROI to measure success.
Follow Up: Share materials, thank attendees, and promote future events.
Pro Tip: Use event management software to streamline tasks like budgeting, registration, and scheduling.
This checklist ensures nothing falls through the cracks, leaving you prepared for a seamless event day. Ready to dive into the details? Let’s break it down step by step.
Essential Guide: Event Pre-Planning Checklist
Set Event Purpose and Target Audience
Start by defining your event’s purpose and understanding who you’re planning it for. These two steps will guide all your decisions moving forward.
List Specific Event Goals
Set measurable goals to evaluate your event’s success. Here are some examples:
Goal Type
Example Metrics
How to Measure
Attendance
500 attendees
Registration count
Revenue
$50,000
Ticket sales and sponsorships
Engagement
85% satisfaction
Post-event surveys
Lead Generation
200 qualified leads
Business card scans
Define Target Attendees
Shape your event by pinpointing key traits of your audience:
Job roles and industries they work in
Authority to make decisions and manage budgets
Level of technical knowledge or expertise
Geographic location and ability to travel
Patterns from past event attendance
Your registration platform can help you gather this data, which will influence everything from session topics to catering choices.
Pick Event Type
Select an event format that aligns with your goals and audience needs:
Accessibility: Decide if your event will be in-person, virtual, or hybrid by considering where your audience is located and their schedules.
Content Delivery: Match the format to your event’s purpose. Workshops are great for hands-on learning, while conferences work well for networking and sharing knowledge.
Resources: Factor in your budget, time, and available resources to determine what’s feasible.
Lock in your event type before moving forward with budgeting.
Plan and Track Budget
Set up a detailed budget to keep your event on track and running smoothly.
List All Expected Costs
Start by outlining every potential expense. Here’s a breakdown of common categories and their typical cost ranges:
Expense Category
Common Items
Typical Cost Range
Venue
Space rental, insurance, permits
25-35% of budget
Production
AV equipment, staging, lighting
15-20% of budget
Catering
Food, beverages, service staff
20-30% of budget
Marketing
Signage, branding, promotional materials
10-15% of budget
Talent
Speakers, entertainers, travel costs
10-20% of budget
Software
Event management platform, registration tools
5-10% of budget
For better accuracy, break down each category further. For example, under catering, consider per-person meal costs, staff wages, rentals for serving equipment, dietary accommodations, and drink options.
Set Up Budget Tracking
Use tools to stay on top of your spending. Many event management platforms include budget tracking features that let you:
Log and categorize expenses for easy reference.
Compare actual costs to your estimates to spot discrepancies early.
Track payment deadlines to avoid late fees.
Store vendor invoices and contracts in one place.
Generate financial reports to review spending trends.
Daily updates to your budget tracker help you catch issues early and make quick adjustments if needed.
Add Emergency Funds
Set aside 5-10% of your budget for unexpected expenses. Some examples include:
Last-minute vendor cancellations or changes
Expedited shipping costs
Extra equipment or supplies
Backup plans for bad weather
Sudden price increases
Keep this reserve separate from your main budget and document any withdrawals. This cushion ensures you’re prepared for surprises without jeopardizing your overall budget.
Book Venue and Test Equipment
Choose and Reserve Location
Start looking for a venue about 8 months before your event. To streamline the process, prepare a detailed Request for Proposal (RFP) that outlines your needs. Here are some key factors to consider:
Venue Feature
Key Considerations
Space & Layout
Capacity, floor plan, accessibility, parking
Technical Setup
Built-in AV equipment, power outlets, WiFi strength
Services
Catering, setup/teardown, security
Contract Terms
Deposit policies, cancellation terms, insurance
Cost Details
Rental fees, extra charges, hidden costs
When discussing terms with venues, offer 2-3 possible dates to increase your chances of securing a good deal. Request floor plans and arrange walk-throughs to evaluate the space in person.
“There are several venues that require a certain amount of liability as well as them named as additional insured for the event. Typically you can ask your general liability insurance agent for this endorsement for your event. It is also a great idea to START EARLY in planning to have this added as well as to have all of the wording required, address, etc., prior to contacting your agent.” – Amy Hallquist-Hamric, president of Hallquist Insurance Agency
Once your venue is booked, shift your attention to confirming the technical setup.
Check All Tech Systems
A week before the event, conduct a thorough check of all technical systems. Pay attention to these areas:
Audio Equipment: Test microphones for presenters, panel discussions, and audience Q&A. Ensure sound quality is consistent across the venue.
Visual Systems: Verify projector brightness and confirm displays are appropriate for the room size and viewing distances.
Internet Connectivity: Test WiFi to ensure it can handle the expected number of attendees using social media, accessing materials, or engaging in online activities.
Create Backup Plans
Be prepared for unexpected technical issues with these backup strategies:
Have a secondary space available for emergencies or overflow.
Keep extra microphones, cables, adapters, and offline copies of presentations.
Set up redundant internet options, such as both WiFi and hardwired connections.
Compile an emergency contact list for venue staff and technical support.
Finally, schedule a full rehearsal with all speakers and presenters. This will help identify and resolve any equipment or compatibility issues ahead of time.
Book and Manage Vendors
Book Required Services
Start by drafting a detailed vendor requirements document to outline your needs and expectations. Use the following criteria to evaluate potential vendors:
Selection Criteria
Details
Industry Experience
Look for vendors with experience in similar events.
Portfolio Quality
Review their past projects and results.
Communication Style
Assess responsiveness and clarity.
Risk Management
Check for backup plans and insurance coverage.
Client References
Read testimonials and recent reviews.
Budget Alignment
Ensure pricing is clear and fits your budget.
Vendor contracts should clearly outline:
Service scope
Deliverables
Setup and breakdown times
Payment terms
Cancellation policies
Equipment requirements
Staff assignments
Once contracts are signed, make sure all necessary legal documents are in place.
Get Required Papers
Prepare a compliance checklist to ensure all vendors meet legal and safety standards. This should include:
Business licenses and permits
Liability insurance certificates
Health department certifications (for food vendors)
Workers’ compensation coverage
Equipment safety certifications
Signed service agreements
Having these documents in order avoids potential issues and ensures smooth operations.
Set Up Vendor Communications
Use tools like ClearEvent to centralize all vendor communications. Share key details such as:
Vendor contact information, including emergency numbers
Floor plans and setup instructions
Load-in and load-out schedules
Equipment and power needs
On-site staff assignments
Regular communication is key. Schedule check-ins with vendors and hold a briefing one week before the event. Use this time to:
Go over the final timeline
Confirm setup locations
Test equipment compatibility
Address last-minute concerns
Share emergency contact information
Streamlined communication ensures everyone stays on the same page from planning to execution.
Create Marketing Strategy
With your vendors secured, it’s time to focus on spreading the word about your event through a well-thought-out marketing plan.
Schedule Marketing Activities
Start your promotional efforts alongside event planning. Use a timeline to organize your activities across various channels:
Timing
Marketing Activities
6+ months before
– Launch event website and registration page
– Build your email list
– Announce early bird pricing
3-6 months before
– Begin social media campaigns
– Send out the first round of promotional emails
– Kick off paid advertising
1-3 months before
– Increase social media posting frequency
– Send reminder emails
– Highlight speakers and sessions
Final month
– Post daily updates on social media
– Send last-chance registration reminders
– Make a final promotional push
Focus on platforms where your audience is most active. Keep an eye on engagement metrics and tweak your approach as needed.
Build Sign-up Page
Create a straightforward, user-friendly registration page to encourage sign-ups. Include the following key details:
Event specifics (date, time, location)
Pricing options, including early bird discounts
Information about speakers and session topics
A section for frequently asked questions
A simple, short registration form
Avoid overcomplicating the process. Studies show that long forms with unnecessary fields can drastically lower completion rates [4]. Only ask for information that’s truly useful for your event planning and communication.
Apply Brand Design
Maintain consistent branding across all event materials. Use tools like ClearEvent to:
Add your logo and brand colors
Customize registration forms
Design branded tickets
Create matching email templates
Develop cohesive social media visuals
“Easily customize the appearance of the mobile event app, registration forms, tickets, invitations to match your brand.” [3]
Consistency in branding builds trust and makes your event materials instantly recognizable to your audience. Stick to your brand guidelines to create a polished and professional look.
Complete Event Schedule
Once your marketing strategy is ready, the next step is to organize your event’s schedule and finalize presenter details. This ensures everything runs smoothly on the big day.
Write Timeline
Lay out a detailed schedule that breaks down every activity into clear time blocks:
Rehearsals are the perfect time to refine presentations, test equipment, and identify any technical issues. Once the practice session is done, set up a central hub to manage all event operations.
Create Control Room
Establish a control room to serve as the event’s command center. This space should include:
A quiet, designated area with stable internet access
Monitors to oversee different aspects of the event
Direct communication lines to key staff and vendors
Access to all event management tools and systems
Emergency response resources and contact details
Keep the control room accessible for staff while limiting entry to essential personnel to ensure smooth coordination.
Track Event Progress
After rehearsals and setting up the control room, focus on real-time monitoring during the event. This ensures everything stays on track and any issues are resolved quickly.
Key areas to monitor include:
Attendance Management
Use digital check-ins to monitor attendance and open additional stations if needed.
Technical Operations
Place IT support teams throughout the venue and maintain communication with the audio-visual team for quick issue resolution.
Schedule Adherence
Use event management tools to keep sessions running on time.
“Super simple for […] keeping the lines moving during that conference in making sure that everybody got to our morning […] with plenty of time to spare.” [1]
“Being able to preschedule those announcements just helped to take one more thing off of my mind.” [1]
Review Event Results
After wrapping up an event, the next step is analyzing the results to improve future planning. Dive into the data to measure success and identify areas for refinement.
Get Attendee Input
Send post-event surveys within 24 hours to collect feedback on attendee satisfaction and areas for improvement.
• Were sessions relevant?
• How effective were the speakers?
• Was the material useful?
Future Planning
• Would you attend again?
• What topics interest you?
• Feedback on the venue?
“It is never enough to have just a single key performance indicator; you need three, four, or even five in place to accurately assess whether the event can be defined as a success by your measurement.” – Dan McCarthy, Event Manager, Ultimate Experience [5]
Review Event Data
Evaluate both quantitative and qualitative metrics to measure performance. Focus on these areas:
Attendance Metrics: Compare the number of registered attendees to actual participants to calculate the conversion rate.
Engagement Data: Review session participation, Q&A activity, and networking engagement.
Financial Performance: Determine ROI by comparing revenue to overall costs.
Marketing Impact: Analyze social media reach and the effectiveness of promotional campaigns.
For instance, Drift‘s 2020 virtual event series achieved impressive results: over 36,000 registrations across quarterly events, with an average of 5,000 attendees per event. The series generated more than 300 business opportunities and contributed $1.5M to the sales pipeline [7].
With these insights, you can move forward with meaningful follow-ups to keep the momentum going.
Send Follow-up Messages
Quickly follow up with attendees by sharing:
Event materials and downloadable presentations
Thank-you notes for participants and speakers
Survey links for those who haven’t yet provided feedback
Details on upcoming events
Recaps of key highlights and memorable moments
“Measuring event success through detailed metrics allows you to: Evaluate Performance, Improve Planning, Demonstrate ROI, Enhance Participant Experience.” – InEvent [6]
Conclusion
Pulling off a successful event means paying close attention to the 15 tasks in this checklist. From setting clear goals to managing budgets, coordinating vendors, and executing marketing plans, every step plays a role in ensuring everything runs smoothly.
The right tools can make these tasks much easier. Teri F., Assistant Chair of Prescott Frontier Days – World’s Oldest Rodeo, shares her experience:
“Without a doubt, the best event-planning software out there. Absolutely no cons!” [3]
Centralized tools are a game-changer for keeping all aspects of event planning under control. Here’s how they help during different stages:
Planning Phase
Benefits
Pre-Event
• Track budgets and manage finances
• Add custom branding
• Use automated registration systems
During Event
• Manage schedules in real time
• Streamline on-site check-ins
• Monitor events live
Post-Event
• Access detailed reporting tools
• Collect attendee feedback
• Gain insights from data
Event planning is a process you refine over time. Celena S., Event Founder, highlights this:
“I’m finding it very intuitive to set up my event and there are many, many built-in features that will help me manage my event successfully.” [3]
Measuring event ROI is essential for proving value, justifying budgets, and improving future strategies. Here’s a quick overview of how to track and optimize event ROI effectively:
Why It Matters: Events account for 24% of marketing budgets and ROI averages 25–34%, making measurement critical for aligning with business goals.
Key Challenges: Common obstacles include disconnected systems, unclear goals, and long sales cycles. Solutions involve CRM integration, clear objectives, and lead tracking.
Essential Metrics:
Attendee Feedback: Use surveys to measure satisfaction, session quality, NPS, and engagement.
Financial ROI: Calculate using revenue vs. expenses and advanced formulas.
Lead Tracking: Monitor email signups, demo registrations, and content downloads.
Social Media Results: Track hashtag reach, engagement, and sentiment analysis.
Tools: Platforms like ClearEvent simplify ROI tracking with budgeting dashboards, analytics, and CRM integrations.
Actionable Tips:
Set measurable goals.
Use integrated systems for data collection.
Continuously monitor metrics before, during, and after events.
Here’s what to focus on when collecting feedback:
Metric Type
What to Measure
Collection Method
Satisfaction Score
Overall event experience
1-10 rating scale
Session Quality
Content relevance and speaker impact
Session-specific surveys
Net Promoter Score (NPS)
Likelihood to recommend
Standard NPS question
Engagement Level
Participation and interaction rates
Event app analytics
“We look at feedback, for the most part, we look at audience feedback, we do a survey of course, like every other event, but I personally speak with probably hundreds of attendees in the run-up to, at the conference, following the conference, and some who attend every year.” – Andrea Rosen, Head of Communications, Adobe Design
Income vs. Expenses Breakdown
To calculate financial ROI, you need to track both revenue and expenses in detail. On average, successful events achieve a 25-34% ROI[1].
“Calculating event ROI involves more than subtracting costs from revenue. You have to factor in your time, energy and resources as well.” – Yuliya Datsyuk, Content Manager [1]
For nonprofits, the goal is typically an ROI exceeding 70% of total organizing costs [2]. Below are three common ROI calculation methods:
Model Type
Formula
Best Used For
Return/Investment
Revenue ÷ Expenses
Quick assessments
Incremental Revenue
(Revenue – Expenses) ÷ Expenses
Profit-focused analysis
Incremental Margin
(Gross Margin – Expenses) ÷ Expenses
Comprehensive evaluation
Once financial results are clear, the next step is to track how these numbers connect to business outcomes, like lead generation.
Lead Tracking Results
Tracking leads effectively means syncing your event software with your CRM. For complex B2B sales cycles, multi-touch attribution models are ideal. For shorter sales processes, single-touch models work well [3].
In addition to leads, social media metrics can provide insights into your event’s reach and live engagement.
Social Media Results
Social media data gives you a snapshot of your event’s visibility and audience interaction. Key areas to measure include:
Hashtag reach and usage
Engagement rates during the event
Share of voice compared to competitors
Sentiment analysis of event-related posts
Using event technology platforms, you can consolidate these metrics for easier analysis. Regular tracking allows you to make real-time adjustments and fine-tune your strategy for better outcomes.
ROI Tracking Tools and Methods
Tracking event ROI today requires reliable tools and organized data collection. Let’s look at some practical solutions for gathering and analyzing performance metrics.
Once you’ve gathered financial and attendance data using ClearEvent, you can move on to designing surveys for qualitative feedback.
Creating Effective Event Surveys
Well-structured surveys are key to gaining actionable insights. Here’s how you can approach them:
Pre-event Baseline Survey
Ask attendees about:
Their primary goals for attending
Expected learning outcomes
Networking objectives
Past event experiences
Post-event Evaluation
Gather feedback on:
Specific sessions
Speaker performance
Venue experience
Overall value of the event
Follow-up Impact Survey
Check in after the event to learn:
How they’ve applied what they learned
Any business value they gained
Their likelihood of attending again
Perceived ROI from the event
When combined with integrated data systems, these surveys offer a well-rounded view of your event’s ROI.
Data System Integration Tips
Bringing together your data systems is essential for a unified and complete ROI analysis.
Map Your Data Flow
Pinpoint where data is collected
List the metrics you need
Set priorities for integration
Choose Tools That Work With Your Systems
Make sure your tools align with:
CRM platforms
Marketing automation software
Financial tracking tools
Social media analytics
Sync Your Data
Link registration forms to your CRM
Connect payment systems to accounting software
Tie attendance tracking to marketing platforms
sbb-itb-fd7582d
ROI Calculation Guide
Understanding how to calculate ROI is crucial for justifying budgets and improving future events. Here’s how you can calculate event ROI using three different methods and compare your results to industry benchmarks.
Basic ROI Formula
This straightforward formula works well for events primarily focused on ticket sales:
ROI = (Event Revenue / Event Expenses) × 100
For example, if your event generates $50,000 in revenue and costs $40,000, the ROI would be 125%.
Advanced ROI Formula
This method provides a deeper analysis by factoring in net profit:
Using the same numbers: (($50,000 – $40,000) / $40,000) × 100 = 25% ROI.
Complex ROI Formula
This approach is ideal for events like trade shows or product launches, where the cost of goods sold (COGS) is a factor:
ROI = ((Gross Margin – Event Expenses) / Event Expenses) × 100 Gross Margin = Event Revenue – Cost of Goods Sold
Including COGS gives a more detailed picture of profitability.
Industry Benchmarks and Trends
Industry data can provide helpful context for your ROI results. Here are some key figures:
Many trade shows report ROI figures between 25% and 34%.
Fortune 500 companies often see $5 earned for every $1 spent on trade show exhibitions.
Lead conversion rates for trade shows typically range from 5% to 10%.
The global events industry is estimated to hit $2.1 trillion by 2032.
When assessing your event’s performance, don’t just focus on immediate financial returns. Consider long-term value metrics and track ROI across events to uncover patterns and areas for improvement.
Applying ROI Data to Next Events
Finding Performance Gaps
Use ROI data to uncover areas that need improvement. By analyzing attendee behavior and engagement metrics, you can identify weak spots in your event strategy.
For example, Queen Bee’s Art & Cultural Center boosted VIP ticket sales by switching from email campaigns to targeted social media ads [4].
Key performance indicators to track include:
Session attendance rates: Compare attendance across different tracks and time slots to spot trends.
Engagement metrics: Keep an eye on Q&A participation, networking activities, and content downloads.
Revenue streams: Identify which ticket types, sponsorships, or services brought in the most money.
Cost centers: Pinpoint expenses that didn’t deliver enough value.
Budget Planning with ROI Data
Performance analysis helps you make smarter budget decisions. Historical data can guide where to allocate funds for the best results.
“You should be in that budget every single day, pretty much. Anytime you get an invoice, anytime you get an estimate from a vendor, you have to be updating in real time to share with your finance team”.
Here are some strategies to optimize your budget:
Short-term Adjustments:
Shift funds from underperforming areas to activities with higher returns.
Reevaluate vendor relationships based on the value they deliver.
Fine-tune marketing spend by focusing on the best-performing channels.
Long-term Planning:
Use past data to create conservative revenue forecasts.
Set aside contingency funds for unexpected costs.
Develop plans to scale successful elements of your event.
Event Format Improvements
Take your event design to the next level by applying ROI insights. These tweaks can help increase engagement and overall satisfaction:
Adjust session lengths based on attendance patterns.
Rearrange floor plans to improve traffic flow.
Expand networking opportunities in areas with high engagement.
Add gamification features to encourage participation.
Monitor the impact of these changes through:
Post-event surveys from both attendees and speakers.
Real-time activity tracking during the event.
Analysis of lead behavior.
Session attendance metrics.
Revenue performance data.
ROI-Based Event Planning
Key Takeaways
Tracking event ROI is essential in a booming industry projected to hit $2.1 trillion by 2032, with average returns ranging from 25–34%. To make the most of your events, focus on these core elements:
Define Clear Goals: Use SMART objectives to link your event’s success to broader business outcomes.
Integrate Your Data: Combine CRM insights, attendee feedback, and engagement metrics for a full picture of performance.
Monitor Continuously: Measure key metrics before, during, and after your event to spot patterns and opportunities.
With the virtual events market expected to grow to $657 billion by 2030, ROI tracking is just as important for hybrid and digital formats.
How to Start Tracking ROI
To put these principles into action, start by setting specific, measurable goals and selecting an ROI model that matches your event’s purpose. Identify baseline metrics like engagement, web traffic, social media activity, and lead conversions.
Leverage specialized software to automate data collection and analysis. This saves time, reduces errors, and provides real-time insights, helping you make informed decisions throughout the event cycle.